Adding Custom Fields To Bloom Optin Forms
Adding custom fields to a Bloom optin allows you to create custom subscribe forms and collecting additional information from your subscribers.
Bloom supports various email providers. Within each email provider, you can create custom data fields that can store different pieces of information about your email subscribers. This data can then be used to segment your email lists or create email autoresponders. By default, all email providers support the following fields: Name & Email. If you want to collect additional information, you will need to configure new custom fields.
Once a custom column of information has been created for your list within your email provider, a custom field can be added to your email optin module. When a visitor fills out that custom field, the data they input will be saved to your list in the subscriber’s user profile within your email provider’s system.
Adding Custom Fields In Your Email Provider
Each email provider works differently. Before you can add custom fields to your optin form, you will first need to log in to your email provider account and create the custom fields that you would like to use. Please refer to the following directions for your email provider to learn how to create custom fields. After that, continue down the page for more instructions on how to add those fields to your Bloom optin.
ActiveCampaign
ActiveCampaign has a great tutorial about how to add custom fields to your account. You can learn more here. Once you have added custom fields in their system, they will show up automatically in Bloom when you add new custom fields. To learn more, continue to step two.
Aweber
Aweber has a great tutorial about how to add custom fields to your account. You can learn more here. Once you have added custom fields in their system, they will show up automatically in Bloom when you add new custom fields. To learn more, continue to step two.
CampaignMonitor
CampaignMonitor has a great tutorial about how to add custom fields to your account. You can learn more here. Once you have added custom fields in their system, they will show up automatically in Bloom when you add new custom fields. To learn more, continue to step two.
ConstantContact
Unfortunately ConstantContact does not support custom fields. If you need to use custom fields for your list, we suggest using a different provider that is more capable.
Convertkit
Convertkit has a great tutorial about how to add custom fields to your account. You can learn more here. Once you have added custom fields in their system, they will show up automatically in Bloom when you add new custom fields. To learn more, continue to step two.
Emma
Emma has a great tutorial about how to add custom fields to your account. You can learn more here. Once you have added custom fields in their system, they will show up automatically in Bloom when you add new custom fields. To learn more, continue to step two.
Feedblitz
Feedblitz doesn’t require you to add custom fields within their platform. Once they receive data from a custom field that you add to your email optin module, they will automatically save that data within their system. Continue on to learn how to add custom fields to your email optin module.
GetResponse
GetResponse has a great tutorial about how to add custom fields to your account. You can learn more here. Once you have added custom fields in their system, they will show up automatically in Bloom when you add new custom fields. To learn more, continue to step two.
HubSpot
HubSpot has a great tutorial about how to add custom fields to your account. You can learn more here. Once you have added custom fields in their system, they will show up automatically in Bloom when you add new custom fields. To learn more, continue to step two.
iContact
iContact has a great tutorial about how to add custom fields to your account. You can learn more here. Once you have added custom fields in their system, they will show up automatically in Bloom when you add new custom fields. To learn more, continue to step two.
Infusionsoft
Infusionsoft has a great tutorial about how to add custom fields to your account. You can learn more here. Once you have added custom fields in their system, they will show up automatically in Bloom when you add new custom fields. To learn more, continue to step two.
MadMimi
MadMimi has a great tutorial about how to add custom fields to your account. You can learn more here.
MadMimi doesn’t require you to add custom fields within their platform. Once they receive data from a custom field that you add to your email optin module, they will automatically save that data within their system. Continue on to learn how to add custom fields to your email optin module.
MailChimp
MailChimp has a great tutorial about how to add custom fields to your account. You can learn more here. Once you have added custom fields in their system, they will show up automatically in Bloom when you add new custom fields. To learn more, continue to step two.
MailerLite
MailerLite has a great tutorial about how to add custom fields to your account. You can learn more here. Once you have added custom fields in their system, they will show up automatically in Bloom when you add new custom fields. To learn more, continue to step two.
MailPoet
MailPoet has a great tutorial about how to add custom fields to your account. You can learn more here. Once you have added custom fields in their system, they will show up automatically in Bloom when you add new custom fields. To learn more, continue to step two.
Mailster
Mailster has a great tutorial about how to add custom fields to your account. You can learn more here.
Mailster doesn’t require you to add custom fields within their platform. Once they receive data from a custom field that you add to your email optin module, they will automatically save that data within their system. Continue on to learn how to add custom fields to your email optin module.
Ontraport
Ontraport has a great tutorial about how to add custom fields to your account. You can learn more here. Once you have added custom fields in their system, they will show up automatically in Bloom when you add new custom fields. To learn more, continue to step two.
SalesForce
has a great tutorial about how to add custom fields to your account. You can learn more here. Once you have added custom fields in their system, they will show up automatically in Bloom when you add new custom fields. To learn more, continue to step two.
SendinBlue
SendinBlue has a great tutorial about how to add custom fields to your account. You can learn more here. Once you have added custom fields in their system, they will show up automatically in Bloom when you add new custom fields. To learn more, continue to step two.
Adding Pre-Defined Custom Fields
Most email providers will send Bloom all of your custom field data, and the optin options interface will be populated with a list of your available custom fields. Once you have added custom fields as described above, they will become available within the Design tab when you create or edit your optin form.
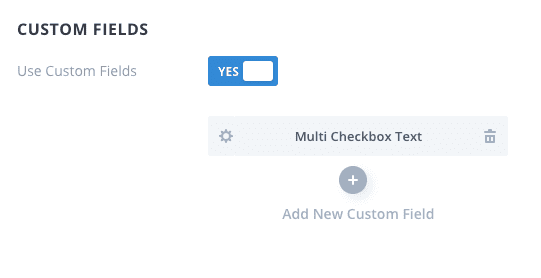
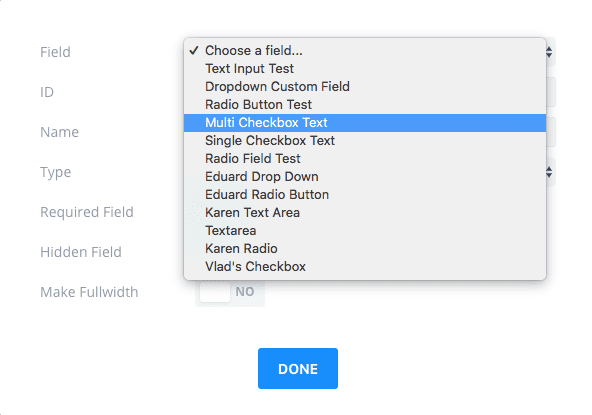
To add a new custom field, click the plus button and then choose your desired field from the Content > Field > Field dropdown menu.
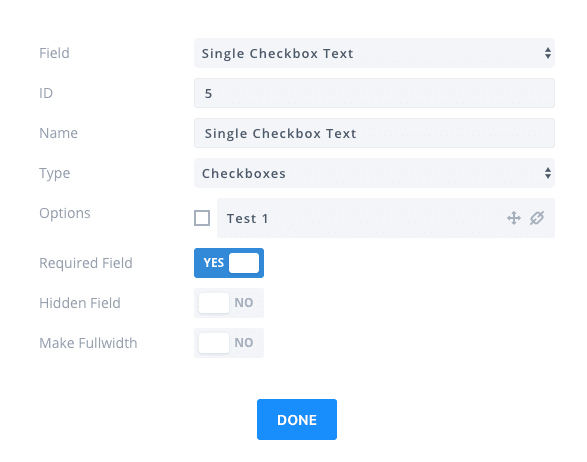
You can then continue on to the Field Options to configure additional settings for your field. Here you can do things like add links to your input labels and re-organize field items.
Adding Manual Custom Fields
Some email providers do not send Divi your custom field data. For these providers, you must configure your fields manually. These providers include: Aweber, Mailster and MadMimi.
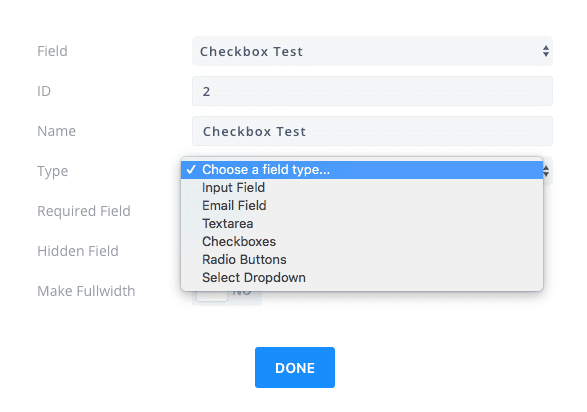
For these providers, you will need to choose which field type you would like to use to collect this specific piece of information. You can pick a field type after selecting your custom field.
Adding Links To Your Checkboxes
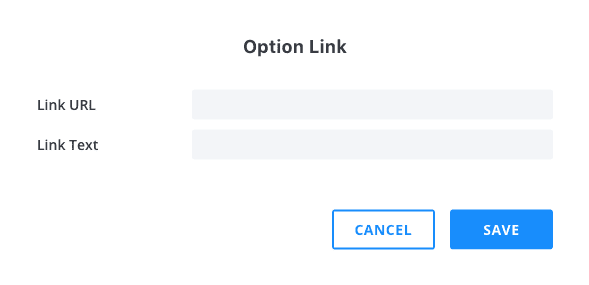
A common use of checkbox custom fields is to record consent for data privacy regulations like the GDPR. In these cases, you may wish to link to your privacy policy or terms of service from a checkbox field item. All checkboxes and radio buttons support custom links. To add a link to a given field item, simply click the link icon and add your link text and link URL:
